HOW CAN I ADD EXTRA DISKS TO MY VMS?
Step 1: Add a new disk
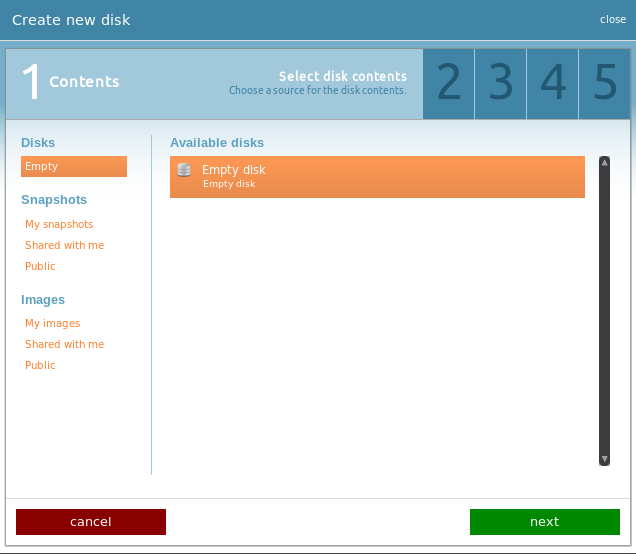
First, select the "Disks" icon from the top options bar and press the big
bright orange button! 
Then make sure that the "Empty disk" option is chosen in the "Available disks" frame and press the "next" button to move on.
Step 2: Select disk size
If you are a member of a project, you can select from the drop-down list whether you want to use the quotas of the project or the default quotas that exist in your account. Next, you may select the disk size by moving the cursor in the size bar or by writing the size you want in the small frame right next to the bar.
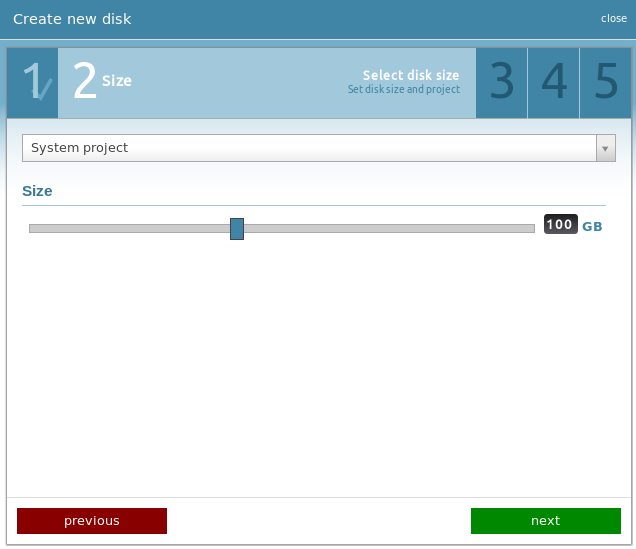
NOTE: If the disk space you set is larger than the available one, you will see the size automatically being set in the largest you can choose.
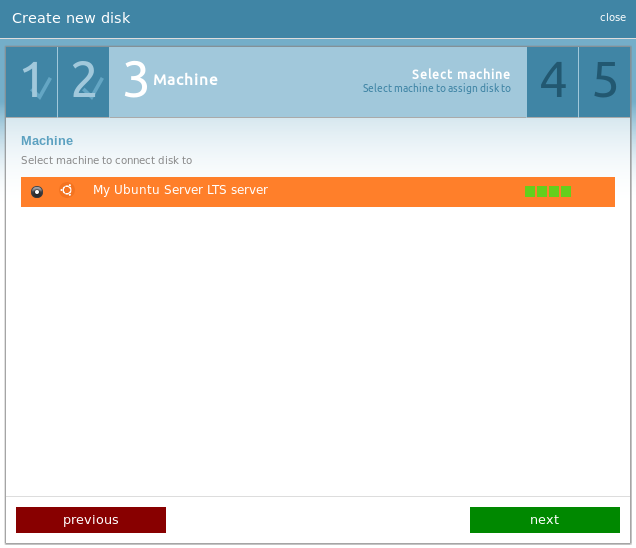
Step 3: Select Machine
In this step you will see a list of your existing VMs from which you may select the one that the new disk will be attached.
Step 4: Select disk details
At this point, you can name your new disk and provide useful info about it.

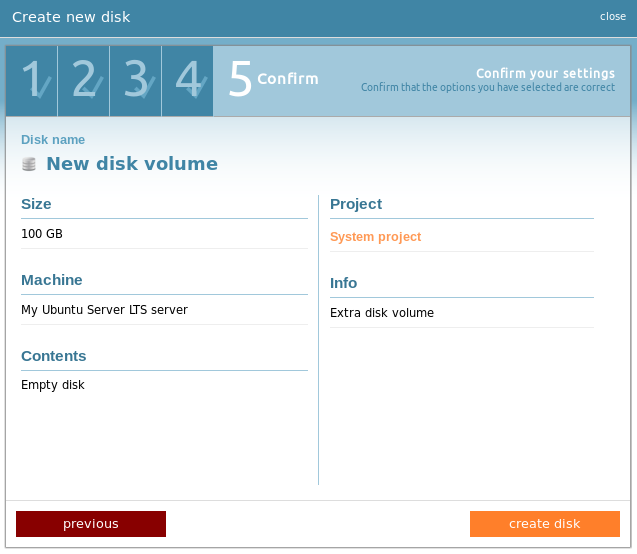
Step 5: Confirmation
Next, you will see a summary of your choices. If everything seems fine to you, by clicking the "create disk" button, your order will be processed and your new disk will be available in no time!
NOTE: The new disk will be created as unformatted. This means that you should format the new disk as you wish (e.g NTFS).
CYCLADES USER GUIDE
- How to create a VM?
- How do I connect to a VM?
- How do I manage my VM?
- How can I resize the CPU/RAM of an existing VM?
- How can I attach/detach an IP on a running VM?
- How can I add extra disks to my VMs?
- How can I detach an extra disk from a VM?
- How can I add tags to my VMs?
- How can I assign my VM to a project?
- What are SSH keys and how can I use them?
- What are private networks?
- What is a firewall and which one should I choose?
- How to create VMs from custom images?
- How can I access all my VMs using one public IP (NAT)?
- How can I update the VirtIO drivers of my Windows VM?
- How can I add IPv6 nameservers on my CentOS/Oracle Linux VM?